New Thanksgiving Classics
9/21/2024 | 27m 55sVideo has Closed Captions
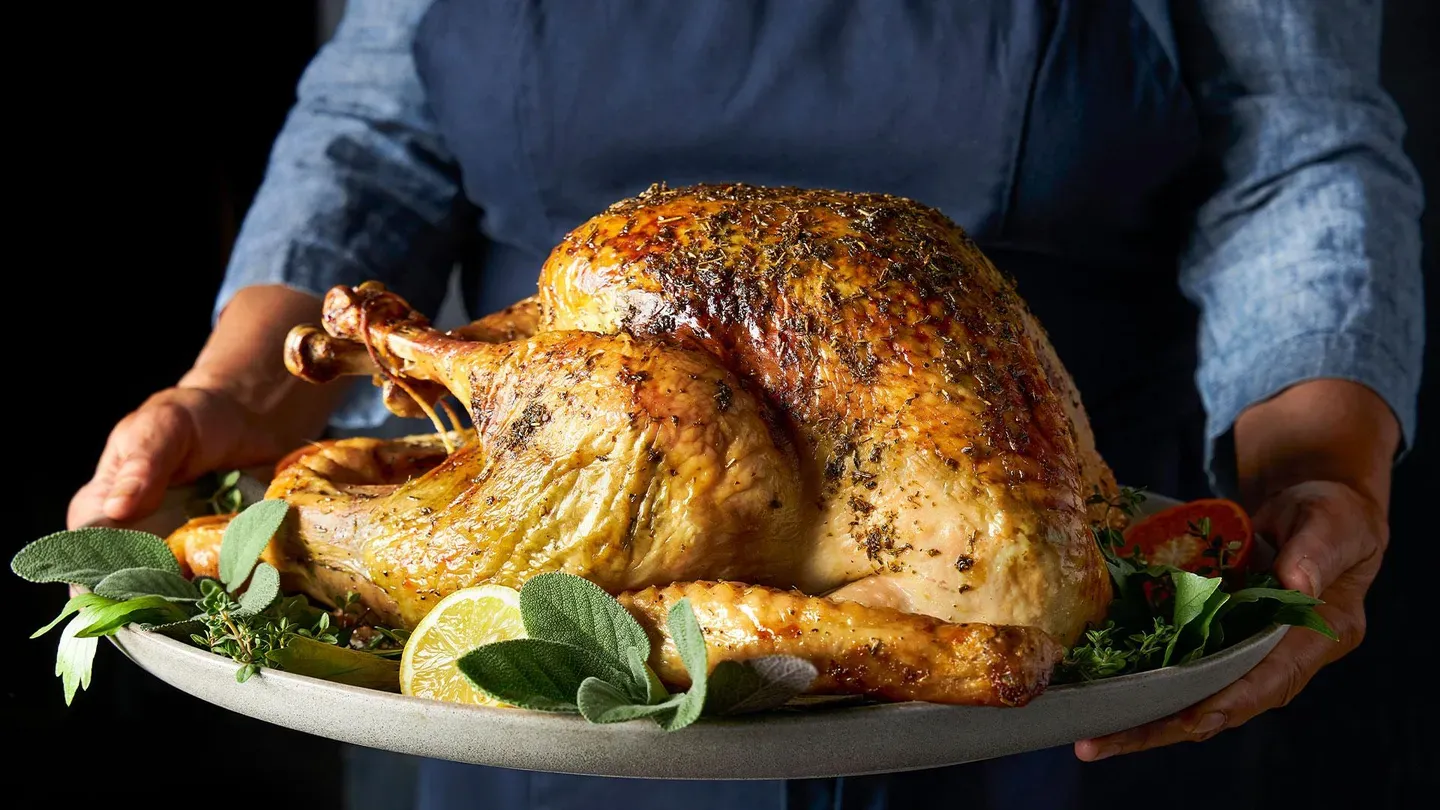
Roast Turkey and Gravy with Herbes de Provence, Bread Stuffing with Cranberries & Walnuts
Test cook Keith Dresser makes host Bridget Lancaster Roast Turkey and Gravy with Herbes de Provence and Lemon. Techniquely host Lan Lam shares tips for slicing meat. Test cook Erin McMurrer makes host Julia Collin Davison Rustic Bread Stuffing with Cranberries and Walnuts.
America's Test Kitchen is presented by your local public television station.
Distributed nationally by American Public Television
New Thanksgiving Classics
9/21/2024 | 27m 55sVideo has Closed Captions
Test cook Keith Dresser makes host Bridget Lancaster Roast Turkey and Gravy with Herbes de Provence and Lemon. Techniquely host Lan Lam shares tips for slicing meat. Test cook Erin McMurrer makes host Julia Collin Davison Rustic Bread Stuffing with Cranberries and Walnuts.
How to Watch America's Test Kitchen
America's Test Kitchen is available to stream on pbs.org and the free PBS App, available on iPhone, Apple TV, Android TV, Android smartphones, Amazon Fire TV, Amazon Fire Tablet, Roku, Samsung Smart TV, and Vizio.
Providing Support for PBS.org
Learn Moreabout PBS online sponsorship♪♪ ♪♪ ♪♪ ♪♪ -Today on "America's Test Kitchen," Keith makes Bridget roast turkey and gravy with herbes de Provence and lemon, and Erin makes Julia rustic bread stuffing with cranberries and walnuts.
It's all coming up right here on "America's Test Kitchen."
"America's Test Kitchen" is brought to you by the following.
-Plugrà European-style butter was created for all chefs, cooks, and bakers, slow-churned with 82% butterfat for a smooth texture and more pliability for flaky crusts.
Plugrà -- from professional kitchens to your home.
-On an American Cruise Lines journey, travelers experience the maritime heritage and culture of the Maine coast and New England islands.
Our fleet of small cruise ships explore American landscapes, seaside villages, and historic harbors where you can experience local customs and cuisine.
American Cruise Lines, proud sponsor of "America's Test Kitchen."
-The Breville Smart Oven Air Fryer Pro has over 13 functions.
Super convection technology puts air frying, dehydrating, and proofing at your fingertips, with space to feed the whole family and compact enough to sit on your countertop.
Results made simple.
♪♪ -Around these parts, "ATK" is affectionately known as Turkey Central, and I'm not talking about my co-workers.
I'm talking about the vast amount of turkey recipes that we have produced over the years.
We're always coming out with more because we know that one size does not fit all when it comes to turkey, and we also like to take a look back and see how to freshen up our older recipes.
Well, Keith is here and he's going to tell us how we refreshed a fan favorite.
-Yeah.
So, Lan developed a turkey recipe six or seven years ago.
Great recipe, a recipe that I use for my Thanksgiving dinner.
Awesome, classic turkey and gravy.
But we have people repeatedly asking us how can we add flavor to that turkey recipe?
So, we went back into the kitchen to answer that question, and that answer was an herb paste.
So, I'm going to start over here.
And I have 3/4 cup of fresh parsley.
I'm going to put that into our food processor.
I also have 1/4 cup of dried herbes de Provence, and that's really the backbone of this herb paste.
I was going to add 2 tablespoons of vegetable oil, 2 teaspoons of lemon zest, 2 teaspoons of garlic powder, and 1/2 teaspoon of black pepper.
I'm just going to buzz this for 30 seconds until everything is finely ground.
Excellent.
That looks great.
We're going to use this herb paste in a couple of different ways.
The first way is we're going to take 1/4 cup of this.
-Oh, I got a waft of that.
That's really nice.
-To the herb paste, I'm going to add some salt and sugar.
We're going to rub this underneath the skin of the bird, season the flesh, but also carry some of those herb flavors into the flesh as well.
So, I have 1/4 cup of the herb paste 1/4 cup of kosher salt, 4 teaspoons of sugar.
Mix that together.
I think that is good.
So, now for our turkey.
I'm going to need to separate that skin from the meat in order to get that salt in there.
So, let's do that.
I have a 14-pound turkey here.
And I'm just going to start with the breast.
That's the easiest place to start.
I'm just going to work my fingers in there to break that membrane that is between the flesh and the skin, making sure that I leave the skin intact right here on that keel bone.
-Right.
-Because if not, everything will peel back.
So, you want to make sure you have an anchor still.
Okay, so, that is our breast meat.
Now I'm going to do the legs.
So, sometimes if you hold on to the skin and push the leg backwards like that, it'll help separate it.
Okay.
That's great.
Now, for our salt.
I'm going to start with both sides of the breast.
I'm going to put 2 tablespoons on either side.
Now, there are many ways you can do this.
You can empty the salt in your hand and try to get your hand in there.
I find it easier just to take the tablespoon and put it in there and get it back as far as you can get.
It doesn't have to be all the way back because you can massage the salt down.
So, as long as you get it about halfway back, I think that's pretty good.
So, I'm just going to take that and smooth it back with my hands.
Rub that salt in there.
You can get your hands underneath as well.
Make sure we have a nice coating on the breasts.
I'm going to use 4 teaspoons on either leg.
Again, just like the breast, once you get it on the top, you can kind of take it with your hands and massage it into that flesh to get a good, even distribution.
Now I'm just going to take the rest of this and I'm going to put it into the cavity.
People think that because there's a lot of bones in there, it doesn't make any sense to salt it.
But we're going to be letting this sit for 24 to 48 hours.
So, that will have plenty of time to work through that bone.
Now that's a well-seasoned bird.
So, a couple more things.
I'm just going to take the wings and give the turkey a half Nelson.
Tuck those underneath so they're out of the way and they don't burn.
And then one more thing.
I'm just going to take a piece of twine, and I'm going to tie these legs together.
Not looking to tie the legs together too, too tight.
Just want to keep it from splaying out.
-Gotcha.
-So, I'm just going to transfer that over to a wire rack.
We're going to put that in the refrigerator for 24 to 48 hours.
The longer the better.
And we're going to leave it uncovered.
And what we want that skin to do is dry out, and that's going to mean better browning and better crispness when we roast the turkey.
So, I'm just going to wash my hands and then I'll transfer that over to the refrigerator.
-Okay.
-Our turkey is nicely dried.
It's been in the refrigerator uncovered for 24 hours.
Now.
We're going to get ready to roast this.
But there's a couple things we're going to do before we put it in the oven.
-Okay.
-First thing I want to do is I want to go through and kind of blot any pockets of moisture that I see, making sure that we have dry skin, because as we know, moisture is the enemy of browning.
That looks great.
Now I'm going to take a mixture of vegetable oil.
I have 1-1/2 teaspoons of vegetable oil in here.
And I'm going to add a teaspoon of baking powder.
Now that baking powder is slightly alkaline.
So, what that's going to do is it's going to speed up browning.
And also, because it's slightly alkaline, it will break down some of the proteins and give us a crisper skin.
-Mmm.
-So, I'll just stir this into a little slurry.
Drizzle this over the top.
Just make sure we get this on any exposed areas here.
And I'll just take a brush.
-It really doesn't take a lot of that.
-No, it doesn't need that much.
Okay, that looks good.
One other thing we're going to do here is I'm going to make a foil shield for the white meat.
And what that's going to do, is it's going to protect the white meat and just even out the cooking between the white meat and the dark meat, because we want them to finish cooking at the same time.
-Right.
-So, I have a piece of foil here.
I'm just going to fold this over.
And what we're looking at is, oh, home plate or maybe a house.
-So, you're just slowing down the cooking of the breast meat.
-Exactly.
So, now we're ready to roast.
But I kind of have a special roasting setup over in the oven.
I want to show you that.
-Alright.
-So, this is our roasting setup.
What I've done is I've put a baking steel in the bottom of our oven.
You can also use a baking stone.
And I've put the roasting pan on top of that baking steel.
And I've preheated oven to 500 degrees for half an hour.
So, what we want to do is we want to put a lot of heat into the bottom of that turkey, the dark meat, and that way we'll cook the dark meat and the white meat at the same rate.
So, I'm just going to take this out of the oven.
-Kind of super-heating the pan.
-Just going to set that on a wire rack.
Now I'm going to take 2 tablespoons of vegetable oil.
I'm going to pour that into our roasting pan.
You can see how hot that is.
It shimmers almost immediately.
-That's right.
-Now I'm going to lift the turkey and put that into our roasting pan.
[ Sizzling ] -Whoo!
That's a good sound.
-Immediate sizzle.
-Yep.
-So, I'm going to put this back into our oven.
I'm going to reduce the oven temperature to 425 degrees.
We're going to cook that for 45 minutes.
-Okay.
-Okay, it's been 45 minutes.
-Ooh!
-So, I'm going to take the turkey out.
I want to take that foil shield off.
-Okay.
-But before I put this back in the oven, I'm going to take some of that herb paste that we made earlier.
I'm going to take 1 tablespoon.
I'm going to stir it into 2 tablespoons of melted unsalted butter.
Now I'm going to take this herb butter I'm going to brush it all over the turkey.
This is going to look beautiful.
But the butter is also going to aid with browning.
So, what we're going to do now is we're going to go back to the oven.
We're going to turn the oven temperature down to 325 degrees.
We're going to let this finished roasting quite slowly.
So, what we're looking for is we want the white meat to register 160 degrees.
The dark meat will be 175 degrees.
That will take anywhere from an hour to an hour and a half.
-Alright.
-Let's check on our turkey.
-Mmm!
-Oh, yeah!
Look at that golden color.
-Gorgeous.
That is beautiful.
-We just want to check the temperature.
So, I'm going to go into the thigh right here.
And it is 175 degrees.
So, we want to check the white meat.
And what we're looking for is 160 degrees.
That's great.
Spot on.
I want to get this out of the pan because we want to take those drippings to make gravy.
We'll just take a pair of tongs and put that into the cavity like that.
And... -Nicely done.
-So, we want to let that sit for 45 minutes.
-Okay.
-And now I want to take and make sure that we scrape up any of these little brown bits off the bottom of our roasting pan because as you know, those brown bits mean flavor.
So, I'm just going to take that.
Now I want to strain off any of these solids.
So, I have a fine-mesh strainer set in the bowl.
Now I want to make sure we get the fat and the broth separated.
So, I'm just going to pour that into a fat separator.
It's been 10 minutes.
And you can see that our fat has separated it from our drippings.
So, I'm just going to take this, and we're going to pour off a cup of these drippings.
-Alright.
Look at that!
-Okay, perfect.
I don't want to throw away this fat.
We're actually going to take this fat, and that's what's going to build the base of our gravy.
So, I'm looking for 3 tablespoons 3.
Okay.
So, I'm going to heat this over medium-high heat.
And we want to get this shimmering.
Okay, that is shimmering.
And I'm just going to add the neck to that.
And the heart and the giblets.
I'm going to brown that for 10 to 12 minutes, and we're going to get it nice and dark brown on both sides.
Create some fond in that pan to help flavor our gravy.
-Okay.
-It's been 10 minutes, and we have a nicely browned neck here and our other giblets.
I'm going to take those out.
Now for the vegetables, I'm going to add one small onion that's been finely chopped.
I'm also going to add one sliced carrot.
-Okay.
-I'm just going to stir those in.
I'm going to turn down the heat to medium.
I'm going to let those cook until the vegetables are softened.
It'll take 5 to 7 minutes.
It's been five minutes, and you can see that the vegetables are softened, but more importantly, the moisture that the vegetables give off have kind of deglazed that pan.
So, all that fond is going to get into our gravy.
I'm just going to take 5 tablespoons of all-purpose flour and sprinkle that over the vegetables.
I'm just going to stir this in.
Now that fat and that flour are going to combine to create a roux, and that is what's going to thicken our gravy.
So, I'm going to switch over to a whisk and take our 1 cup of drippings.
And I'm going to slowly add this while whisking constantly.
The reason why I'm adding this slow is we don't want any lumps in our gravy.
Okay, now for the remaining ingredients, I have 3-1/4 cups of water.
-That's how flavorful this is?
You're not adding chicken stock.
-That's right.
I'm glad you noticed that.
Those drippings do have a lot of flavor.
And we don't need to build more flavor with artificial stock.
-That's great.
-I'm also going to add 1/4 cup of white wine, five sprigs of fresh parsley, and two bay leaves.
Now we want to add our browned neck and our giblets back in there because those will add a ton of flavor.
So, we're just going to bring this up to a simmer until it's nice and thick.
Take about 10 minutes.
-Okay.
-Gravy has been bubbling away here for 10 minutes, and it's nicely thickened.
-It is beautiful.
-Looks beautiful, doesn't it?
So, I'm just going to take the neck out of here before I strain this off so we don't have that splashing around.
Pour this into a bowl here.
Now, we have a little bit of that herb paste that we made earlier left over.
And that is going to flavor our gravy.
-Very nice.
-Yeah, I think that really makes it.
And I think we are good to go with the gravy.
Now we can carve the turkey, and then we can get to eating.
It's been 45 minutes.
The turkey has fully rested.
And now comes my favorite part.
Actually carving the turkey is one of my favorite things to do.
Okay, first thing, we want to get rid of this twine here to free up our legs.
Set that aside.
Now, I start with the legs, and I just cut that skin in between the breast and the leg, slowly.
Now I can see the leg joint, and I take that and snap it back like that, and then cut right through there, like so.
-Fantastic.
-So, now that I have my legs, I'm going to take these and carve these before I get into the breast.
So, I'm just going to separate the leg from the thigh.
So, there's a joint right there.
Cut right through that joint, one fell swoop.
That goes on to our platter like that.
What I like to do is I like to take the thigh bone out.
Okay, now that we have that thigh bone out, I like to go over to a chef's knife to slice it across the thigh like that.
Our thighs and our legs are done, and now we can focus on the breast meat.
I start with the keel bone right here.
And the bone structure of the turkey is kind of an inverted Y.
So, you have one bone and it kind of splits out halfway down.
So, I like to kind of score with the tip of the knife, putting my knife right up against that keel bone or the breast bone.
Once you start to feel the rib cage, follow that rib cage down there.
Now I'm going to take this opportunity to remove the wings, and now I find it easier to remove the wings once I have the breast off because it exposes the wing joint.
-Nice, little drumette, little flat.
-Okay, now for the breast.
Now, you can cut this any thickness you want.
I find if I cut the slices thicker, I can keep the skin on a little bit better.
So, I would say 3/4 inch.
But again, you can cut it as thin or thick as you want.
Let's eat this.
I-I'm tired of waiting.
-I'm crying over here.
-I'm going to give us a piece of white meat.
A piece of dark meat now.
-Very nice.
-Gravy?
-Hmm, yes.
-Yes.
-There you go.
-Double the amount of gravy for you?
-I am going to first tuck into that breast meat because that is the test, right, of a great recipe?
Mmm.
The meat itself is still really, really juicy.
It is like an herb explosion.
-But the lemon also comes out.
Just 2 teaspoons of lemon zest, and it comes out just a little bit.
Just a hint at the end.
-Mmm.
-Complements those herbs nicely.
-Beautifully cooked, super flavorful.
This gravy -- spectacular.
It's silky.
It's full of flavor.
Really, really rich turkey flavor.
But the herbs just brighten it up right at the end as well.
And you know, what I really appreciate, too, is the flavor profile of this herbes de Provence.
Absolutely beautiful.
Goes really well with the turkey.
-Yeah, and if you don't like herbs or Provence or lemon, we have a couple of other herb pastes that you can find online.
We have one that has fenugreek and sage.
We also have one that has thyme and fennel.
-Sounds great.
You can find all that on our website.
Keith, the turkey is fantastic.
Thank you so much.
-You're so welcome.
-If you want to wake up your turkey game this Thanksgiving, rub an herb paste under the turkey skin before refrigerating overnight, place the turkey on a preheated roasting pan and then roast it on a baking steel and finally stir the remaining herb paste right into the gravy.
So, from "America's Test Kitchen," it's roast turkey and gravy with herbes de Provence and lemon.
Where's the stuffing?
-That's next year.
-Next segment.
♪♪ -Steaks and roasts are pricey, and they can take a lot of work to prepare properly.
And even if you nail the internal temperature and take our advice on resting time, there's still one more thing you can do to ensure ultra-tender results.
And that's slicing against the grain.
What does that phrase mean?
Well, a meat's fibers run parallel to each other, and to maximize tenderness, it's best to set the knife perpendicular to those fibers.
If you're not sure of the direction of the grain, you can always take a sliver of meat off.
Now, if you don't see parallel lines like this, then you've sliced against the grain.
If you do see parallel lines, then you just want to turn that piece of meat 90 degrees.
Now, proper slicing doesn't just help with tenderness, it can also improve appearance.
When I hold my knife perpendicular to this steak and cut straight down, I'm getting these narrow strips that are great for a fajita, but they're not really doing a great job of showing the rosy interior of the meat by tilting my knife at an angle I'm going to still be slicing against the grain, but I'll get a much broader cross-section.
You can see so much more of that interior.
It's just beautiful.
Like with all knife skills, all you need is a sharp knife and a little practice to present your food with added polish.
♪♪ -There's no shortage of opinions when it comes to the Thanksgiving meal.
Some people like dark meat, others prefer white.
Some people like whole-berry cranberry sauce, others the jelly from the can.
And when it comes to the stuffing, there's the soft, steamy kind that's kind of like bread pudding.
And then there's the rustic kind that absorbs all the gravy, which is the kind that Erin's going to show us how to make today.
-I certainly am, Julia.
I love the steamy version, but I also really love this heartier kind of rustic version.
And it all starts with the bread.
-Okay.
-So, let's start here.
So, I have 2 baguettes.
They're both 10 ounces each, and I have one already prepped in the bowl and we're going to prep the other.
So, first the ends.
And, you know, although we love the crust of the baguette, we found that the bottom was a little too tough.
So, I'm just going to remove the bottom of the crust.
So, you just kind of -- -I like how you stand it up.
-Yeah.
Stand it up.
Alright.
Now we're just going to tear the rest of this.
You want to help me?
-Sure.
-Awesome.
So, we're just going to tear this into bite-sized pieces.
So, we want this to be rustic, so we're tearing it.
We're not cutting it.
-I love it.
I love this.
-Yeah.
-So, now we have our baguette.
This is about 12 cups.
And now I'm just going to drizzle 3 tablespoons of extra virgin olive oil over it.
So, now I'm just going to toss it up.
Mix that olive oil around.
Now we're going to transfer them to a rimmed baking sheet.
There we are.
Just spread these out into an even layer.
So, now we're going to toast them.
So, I'm going to put these into a 450-degree oven on the upper middle rack.
And we're going to toast them for about 10 minutes.
I'm going to start halfway through.
We want the edges to be lightly browned and crisp and still chewy in the center.
-Mm-hmm.
-It's coming together, Julia.
This is the first stage.
-Gorgeous.
-So, it's lightly browned.
You'll find that it's crispy on the outside and chewy on the inside, which is what we want.
We want that varied texture.
So, I have 2 cups of chicken broth here.
I'm going to add it right to the pan while it's warm.
And the bread is going to absorb this and soak it up, but it's not going to be soggy.
-Okay.
-It's just going to be moist, and I'm just going to stir it up a little bit.
So, now over here we're going to go with a more traditional flavor.
So, I'm going to melt 2 tablespoons of unsalted butter in a 10-inch skillet over medium heat.
Our butter is melted.
Now we're going to add three stocks of celery that I've cut into 1/2-inch pieces.
-Oh, big pieces.
-Yeah.
Rustic, hearty.
-I like it.
-It'll carry through.
And I'm going to add 1 teaspoon of salt, table salt, and 1/4 teaspoon of ground black pepper.
Now we're just going to cook this until the celery begins to soften.
Just keep that celery moving.
We don't want browning.
We just want it to soften.
This is going to take about 3 to 5 minutes.
Okay, so, you can see that the celery is becoming soft.
-Mm-hmm.
-And now I'm going to add onions.
So, this is two large onions I've cut into 1/2-inch pieces as well.
So, now we're just going to cook this until the onions become softened as well.
And then that's going to take about eight minutes.
Alright, Julia.
So, the onions have been cooking for about eight minutes, and they're softened, they're not browned, and they're looking pretty darn perfect.
-Alright.
-Alright.
So, now we're going to go and add some herbs.
We're going to start with sage.
So, I'm going to add 3 tablespoons of fresh sage.
So, I'm just getting rid of the tougher stems.
Oh, my goodness.
It smells so good.
-It does.
-I'm just going to finely chop this.
And we want 3 tablespoons.
Now I'm going to add my 3 tablespoons of sage, 1/2 a cup of dried cranberries.
-Oh, yum.
-Yeah.
You need a little dried fruit in your stuffing.
Stir this and cook this over medium heat still for just about a minute just to kind of bloom those flavors.
Alright.
So, that's been about a minute.
-Oh, it's smelling just right.
-Now we're going to move back to our bread that's been soaking with the 2 cups of chicken broth.
And I'm just going to transfer this right onto the pan.
You might be tempted to just dump it all into this 9-by-13 pan, but there's really not enough room to actually incorporate all the ingredients very well.
And I'm going to just stir this in.
So, it's kind of folding all those ingredients in.
So, now I'm just going to transfer this into our 9-by-13 baking dish.
I butter this with 1 tablespoon of butter.
-Okay.
-Now we want to spread it into a single even layer.
This is very straightforward.
Again, just simple.
We want this to be like light, fluffy, crispy, chewy, all the good stuff.
We are ready to bake, Julia.
So, we're going to put this into a 450-degree oven on the upper middle rack.
We're going to bake it for 20 minutes.
-Okay.
-Okay.
Mmm!
It smells delicious.
-It's fabulous.
Oh, I love it.
-Okay.
That just baked for 20 minutes.
We're not there yet.
You can see these crispy edges.
I want to fold them into the center of the pan and pull some of the more steamed ones out.
The bottom pieces are very steamy.
-Uh-huh.
-Top pieces are crispy.
I want textural contrast throughout the whole stuffing.
-Okay.
-So, we're going to stir the crispy bits inside.
Pull the soft bits outside.
So, this is going to go back in the oven for 10 minutes until the top is nice and crispy again.
-Great.
Oh, that smells like stuffing!
-Yes, it does.
Nice.
Gorgeous.
Beautiful.
Mission accomplished.
Now we're going to add 3 tablespoons of fresh parsley.
And I'm going to stir this in.
It's always nice to add like little fresh notes to a finished dish.
And you really benefit from that fresh flavor.
And last but not least, we're going to add 1/4 cup of walnuts that I've toasted and chopped coarsely.
So, I'm just going to add this on top.
So, we have like our soft bread or crispy bread.
And we'll get, like, crunchy nuts.
Really good stuff.
-Well, and as you said earlier, once you get the method down, it's easy to change the flavors.
And I can tell that already with the herbs and the nuts and the fruit, you can change it up to suit your style.
-100%.
Whatever you have in the fridge, if you have fennel, pine nuts, you know, whatever you have.
-I love it.
-Go for it.
Year-round.
That's the beauty of this dish.
-Oh, steamy.
-Beautiful.
I'll start with this much.
-[ Laughs ] Right?
Oh, Erin, I got some soft bits.
Crunchy bit.
Mmm!
I love the cranberries in this.
-Yep.
-They don't taste sweet.
They just add a little bit of moisture, a little bit of a slightly sweet fruity note.
But again, it's not overly sweet, which is always my worry when you add fruit to stuffing.
-And it adds, like, a little chew.
-And the bread -- crispy edges, you get that steamy center.
It's a really great contrast.
I could imagine serving this with a pork loin, with a roast chicken, a lot of different things.
-Absolutely, and the walnuts.
It's like the last finished addition, but it's like it just pulls it all together.
-Mm-hmm.
-Rustic, hearty, easy, light.
-And it would soak up gravy like a dream.
-Mm-hmm.
-Erin, this is delicious.
Thank you.
-You're welcome.
-If you want to make this stuffing that is easy enough for every day but fancy enough for Thanksgiving, tear two baguettes into rustic pieces.
Moisten the warm toasted bread with broth and stir the stuffing partway through cooking.
From "America's Test Kitchen," a simple but superb recipe for rustic bread stuffing with cranberries and walnuts.
You can get this recipe and all the recipes from this season, along with select episodes and our product reviews at our website, americastestkitchen.com/TV.
This is awesome.
-I'm not even missing the turkey.
-No, I'm not either.
-Celebrate 25 years of "America's Test Kitchen" and visit our website anytime to access the newest season's full episodes, fail-proof recipes, and ingredient and equipment reviews at americastestkitchen.com/tv25.
Our 25th anniversary cookbook tells the story of how "America's Test Kitchen" changed the way America cooks at home.
This collector's edition includes 500 game-changing recipes and techniques from all 25 seasons of "America's Test Kitchen."
The cost is $29.99.
That's over 30% less than the cover price of $45.
To order, head to our shop at americastestkitchen.com/25book.
"America's Test Kitchen" is brought to you by the following.
-Plugrà European-style butter was created for all chefs, cooks, and bakers, slow-churned with 82% butterfat for a smooth texture and more pliability for flaky crusts.
Plugrà -- from professional kitchens to your home.
-On an American Cruise Lines journey, travelers experience the maritime heritage and culture of the Maine coast and New England islands.
Our fleet of small cruise ships explore American landscapes, seaside villages, and historic harbors where you can experience local customs and cuisine.
American Cruise Lines, proud sponsor of "America's Test Kitchen."
-The Breville+ app has over 1,300 guided recipes from culinary professionals, cook guides that help you turn what's in your fridge into quick meals, plus live and on-demand classes, all tested and tuned for your Breville appliance.
♪♪ ♪♪ ♪♪ ♪♪ ♪♪ ♪♪


America's Test Kitchen is presented by your local public television station.
Distributed nationally by American Public Television